Getting started with Intel Edison on OS X
Note that much of the following information is available in the Getting Started Guide from Intel. However, there is some additional information for assembling the Mini Breakout Board, SSH-ing over Wi-Fi, and package management.
Introduction to Edison
Last month, Intel launched Edison, a tiny computing platform that's just slightly larger than a SD card. Edison is powered by an Intel SoC that includes a dual core Atom CPU and a 32-bit Quark microcontroller, has integrated Wi-Fi and BTLE (Bluetooth Low Energy), and comes pre-packaged with Yocto Linux, Python, and Node.js. Not bad for a tiny computer!
There are two kits that are currently available:
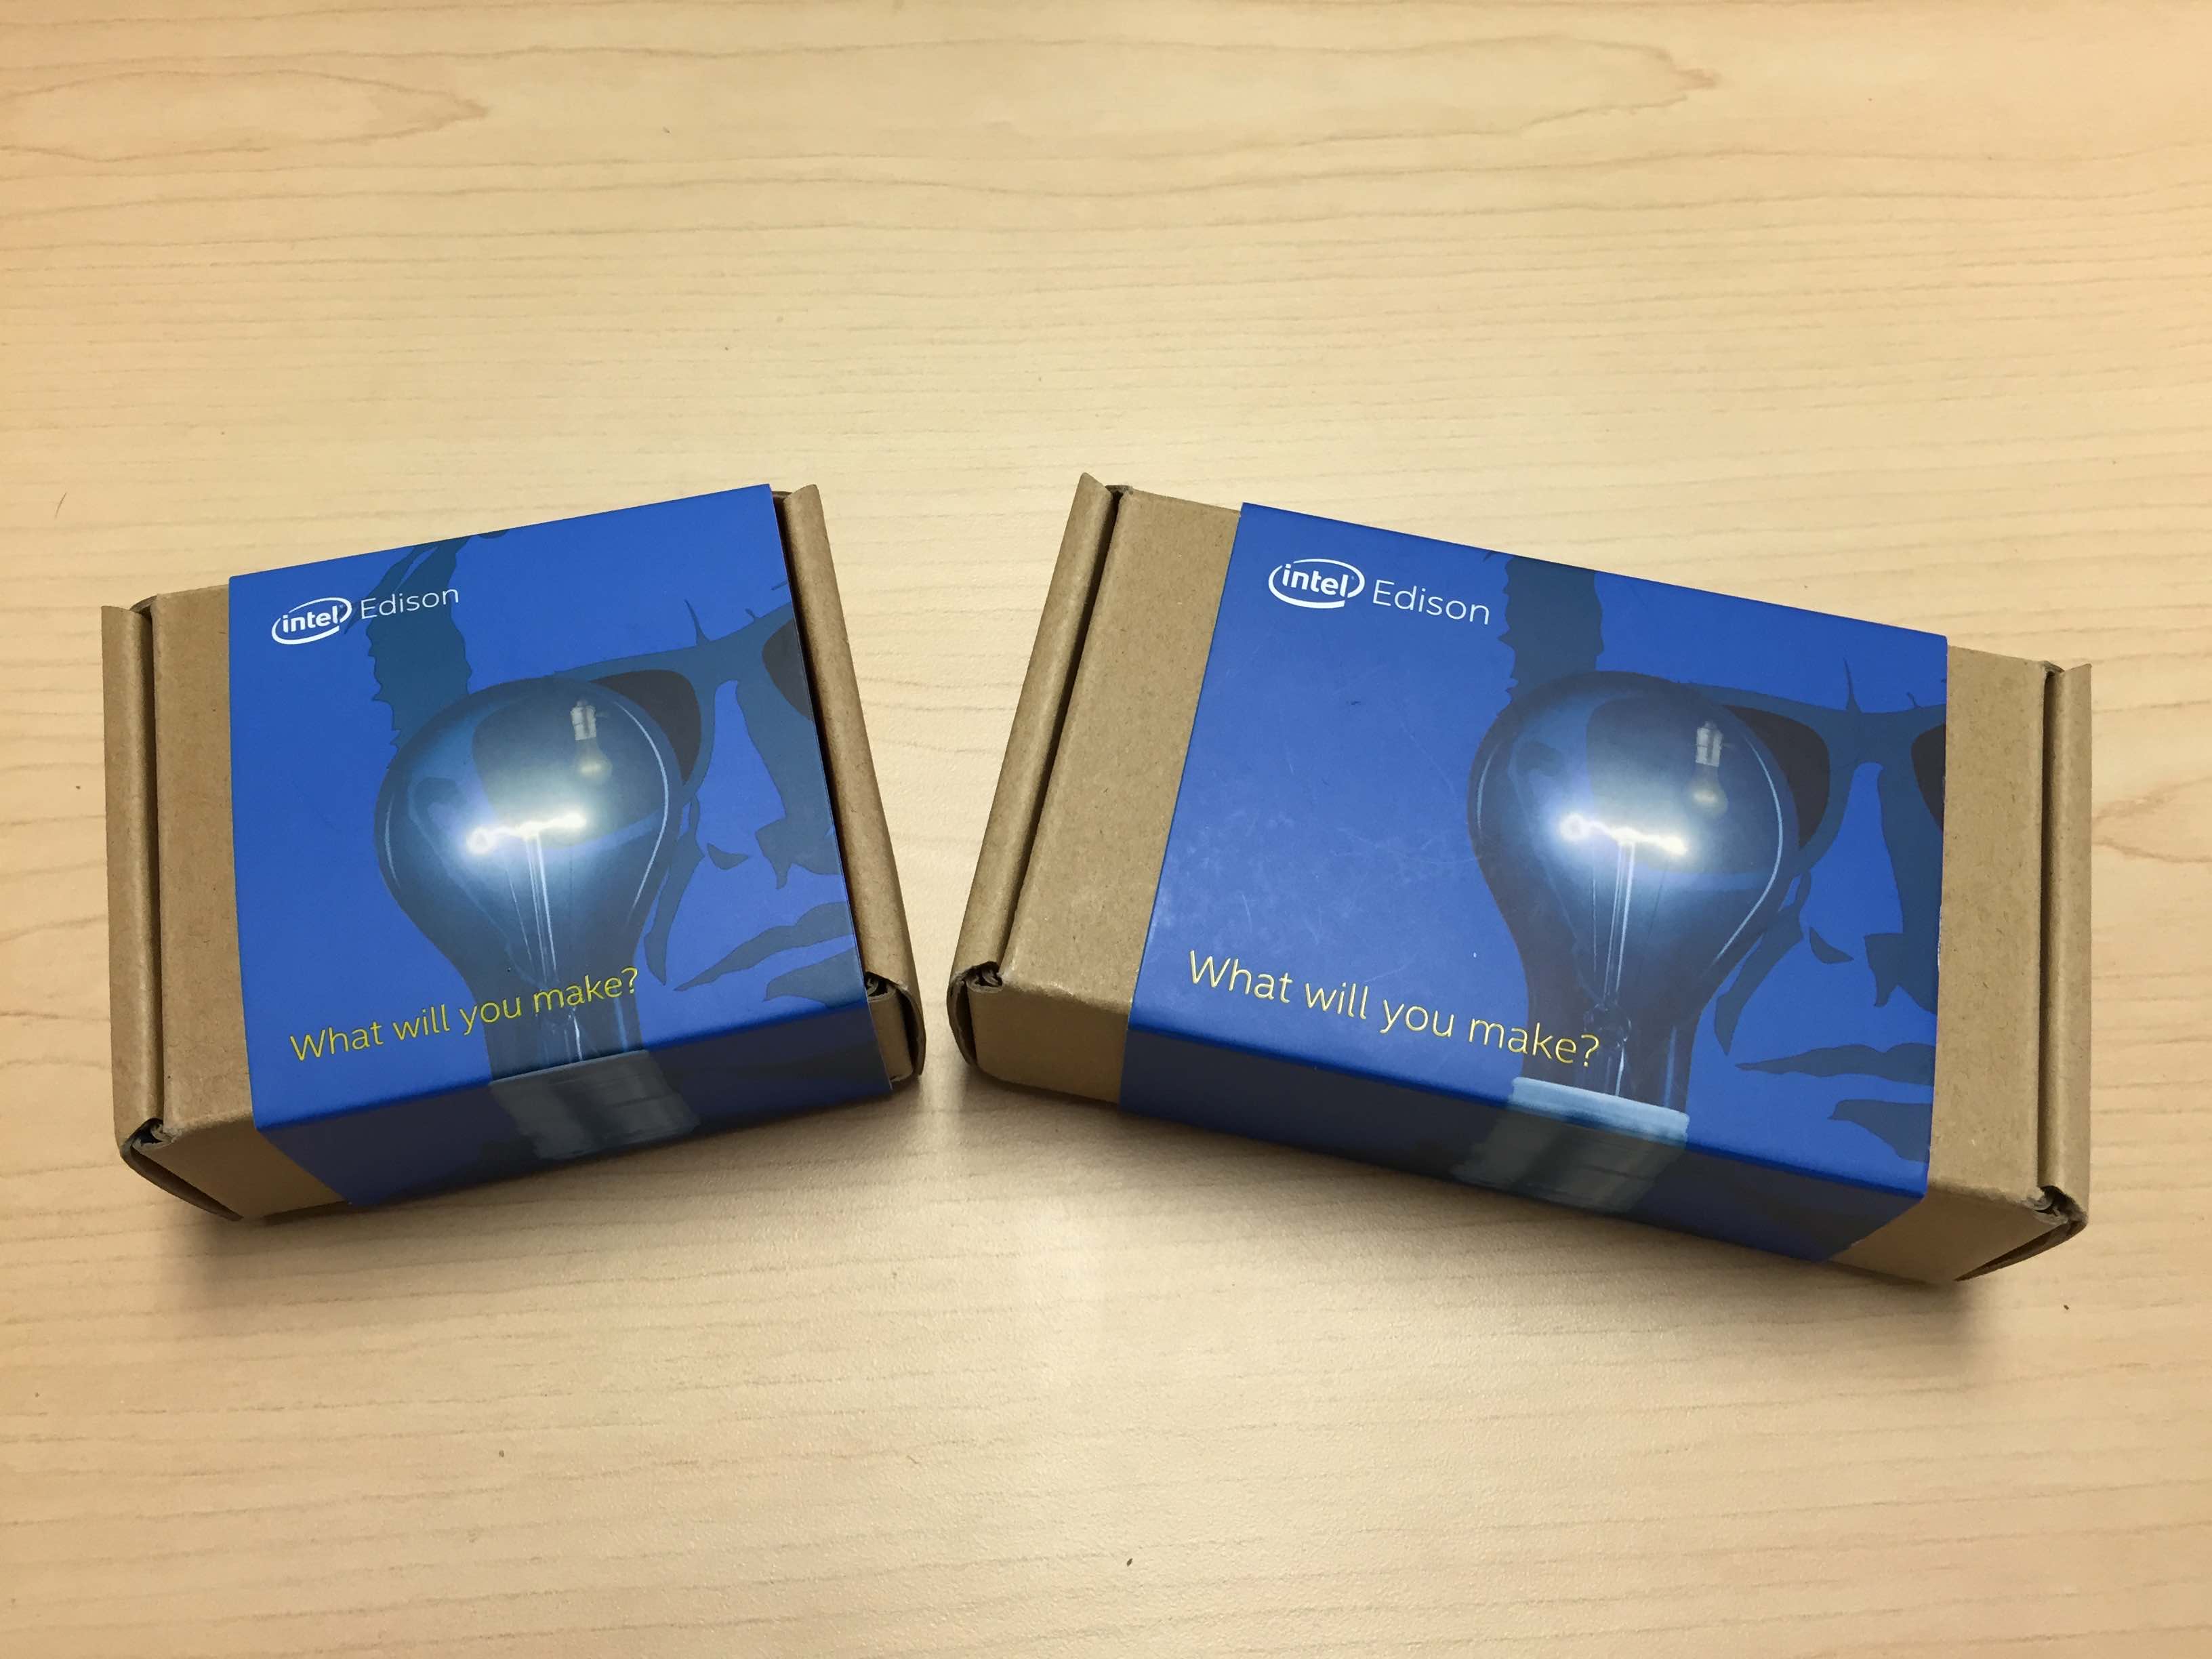
The kit on the left comes with a Mini breakout board, while the kit on the right comes with an Arduino breakout board. While the latter is great if you want to build things that are Arduino-compatible, the size of the board is quite large. The Mini breakout board is better if you want a board that has a much smaller footprint.
Setting up Edison with the Mini breakout board
What's in the smaller box?
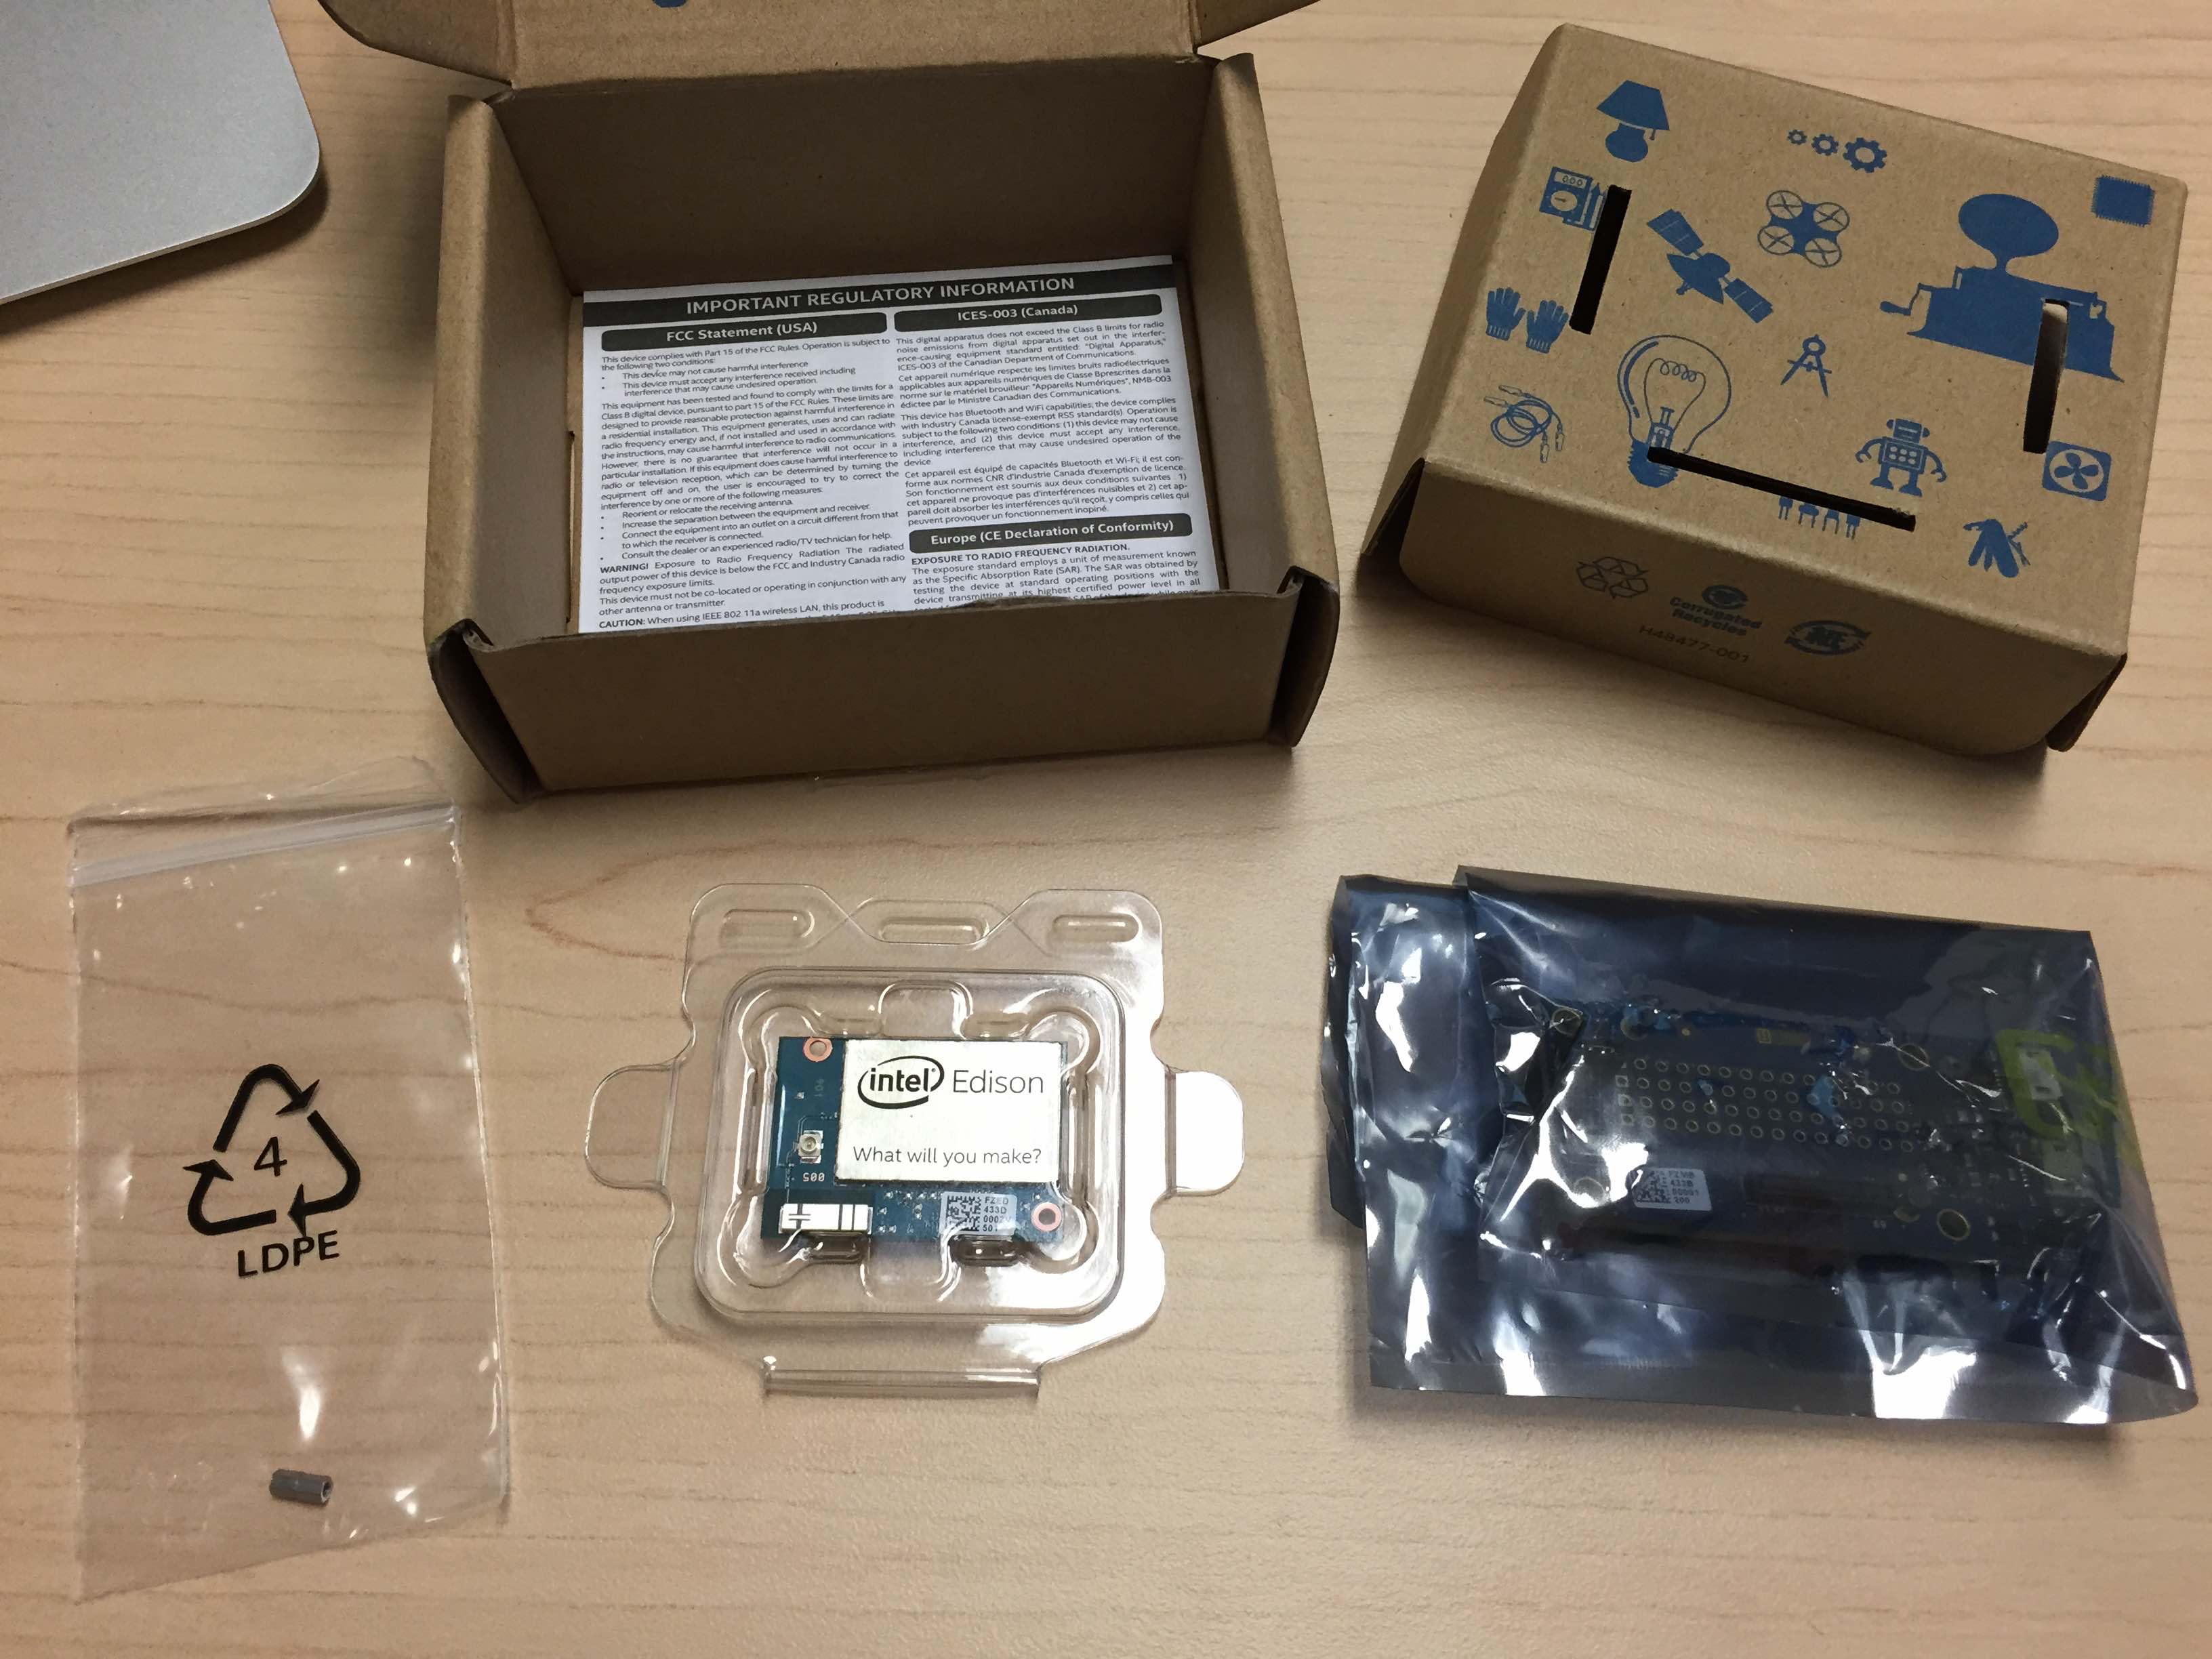
The Mini breakout board kit comes with the following: the breakout board (bottom-right), Edison (bottom-center), and a ziplock bag with two hex nuts (bottom-left).
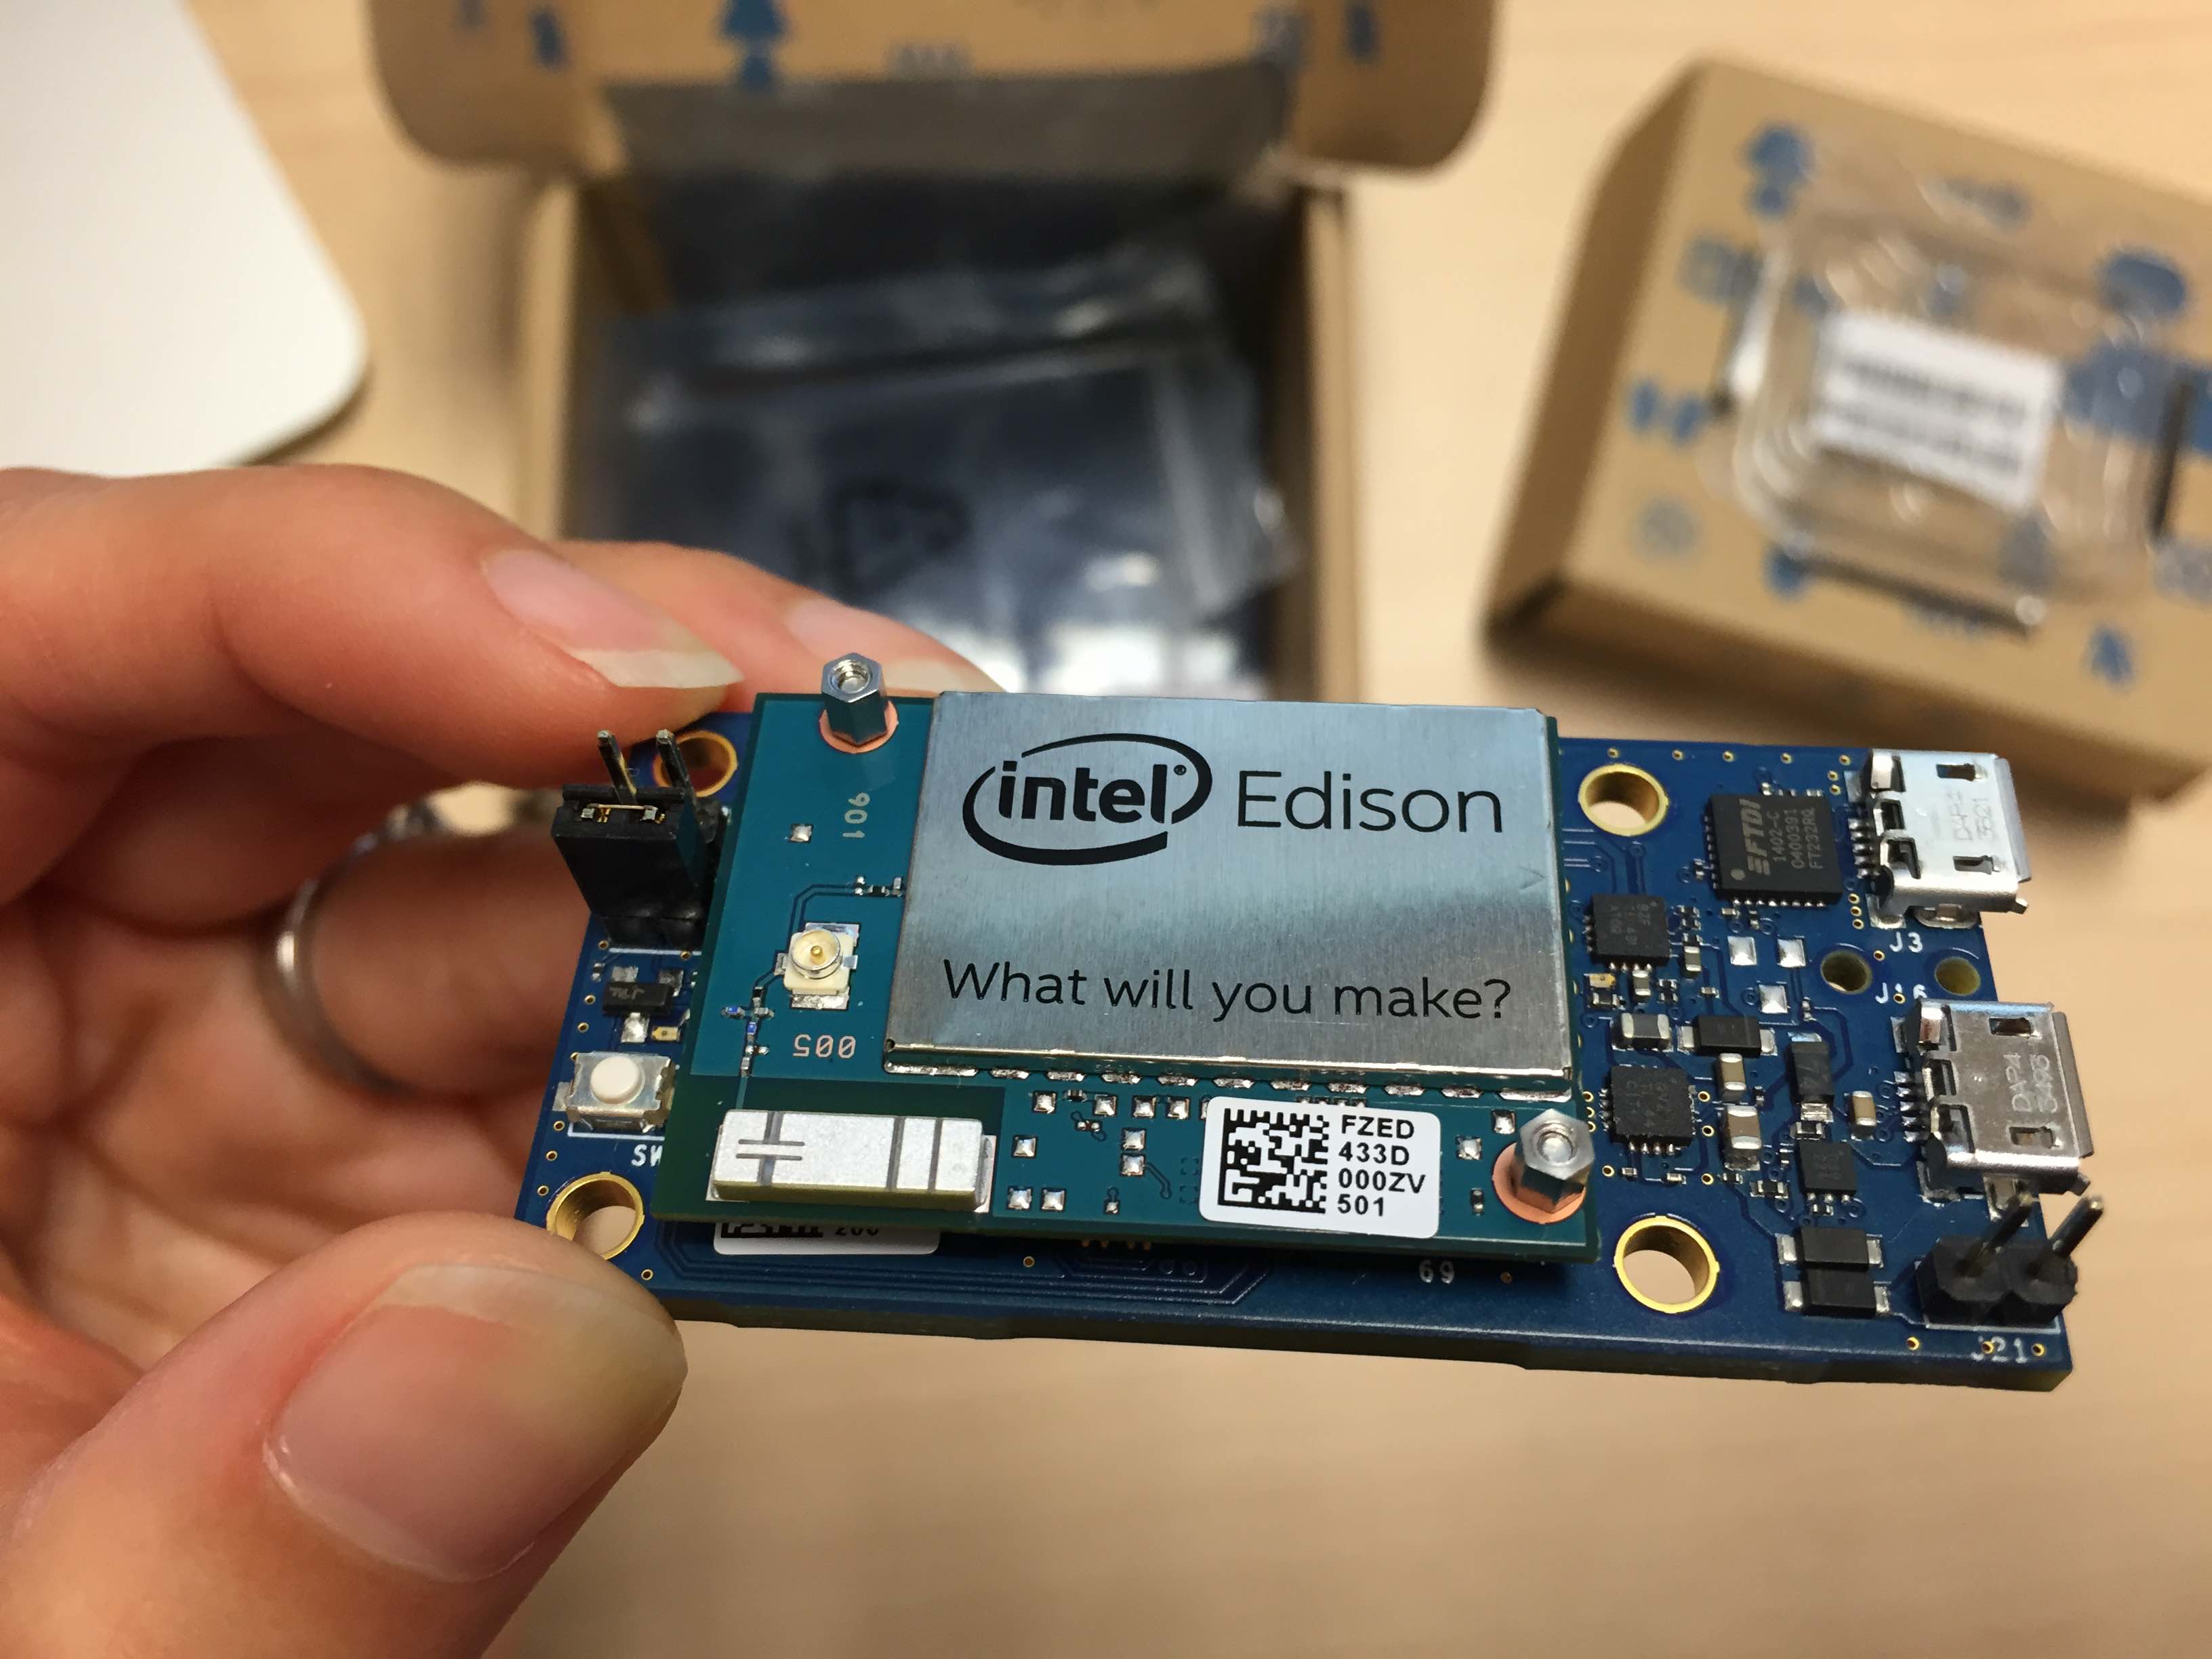
To get Edison onto the board, align the two holes on Edison over the two screws on the board. Push Edison into place until you hear a snap. Then take the two hex nuts (in the ziplock bag) and hand-tighten them onto the screws; they don't have to be screwed on tight.
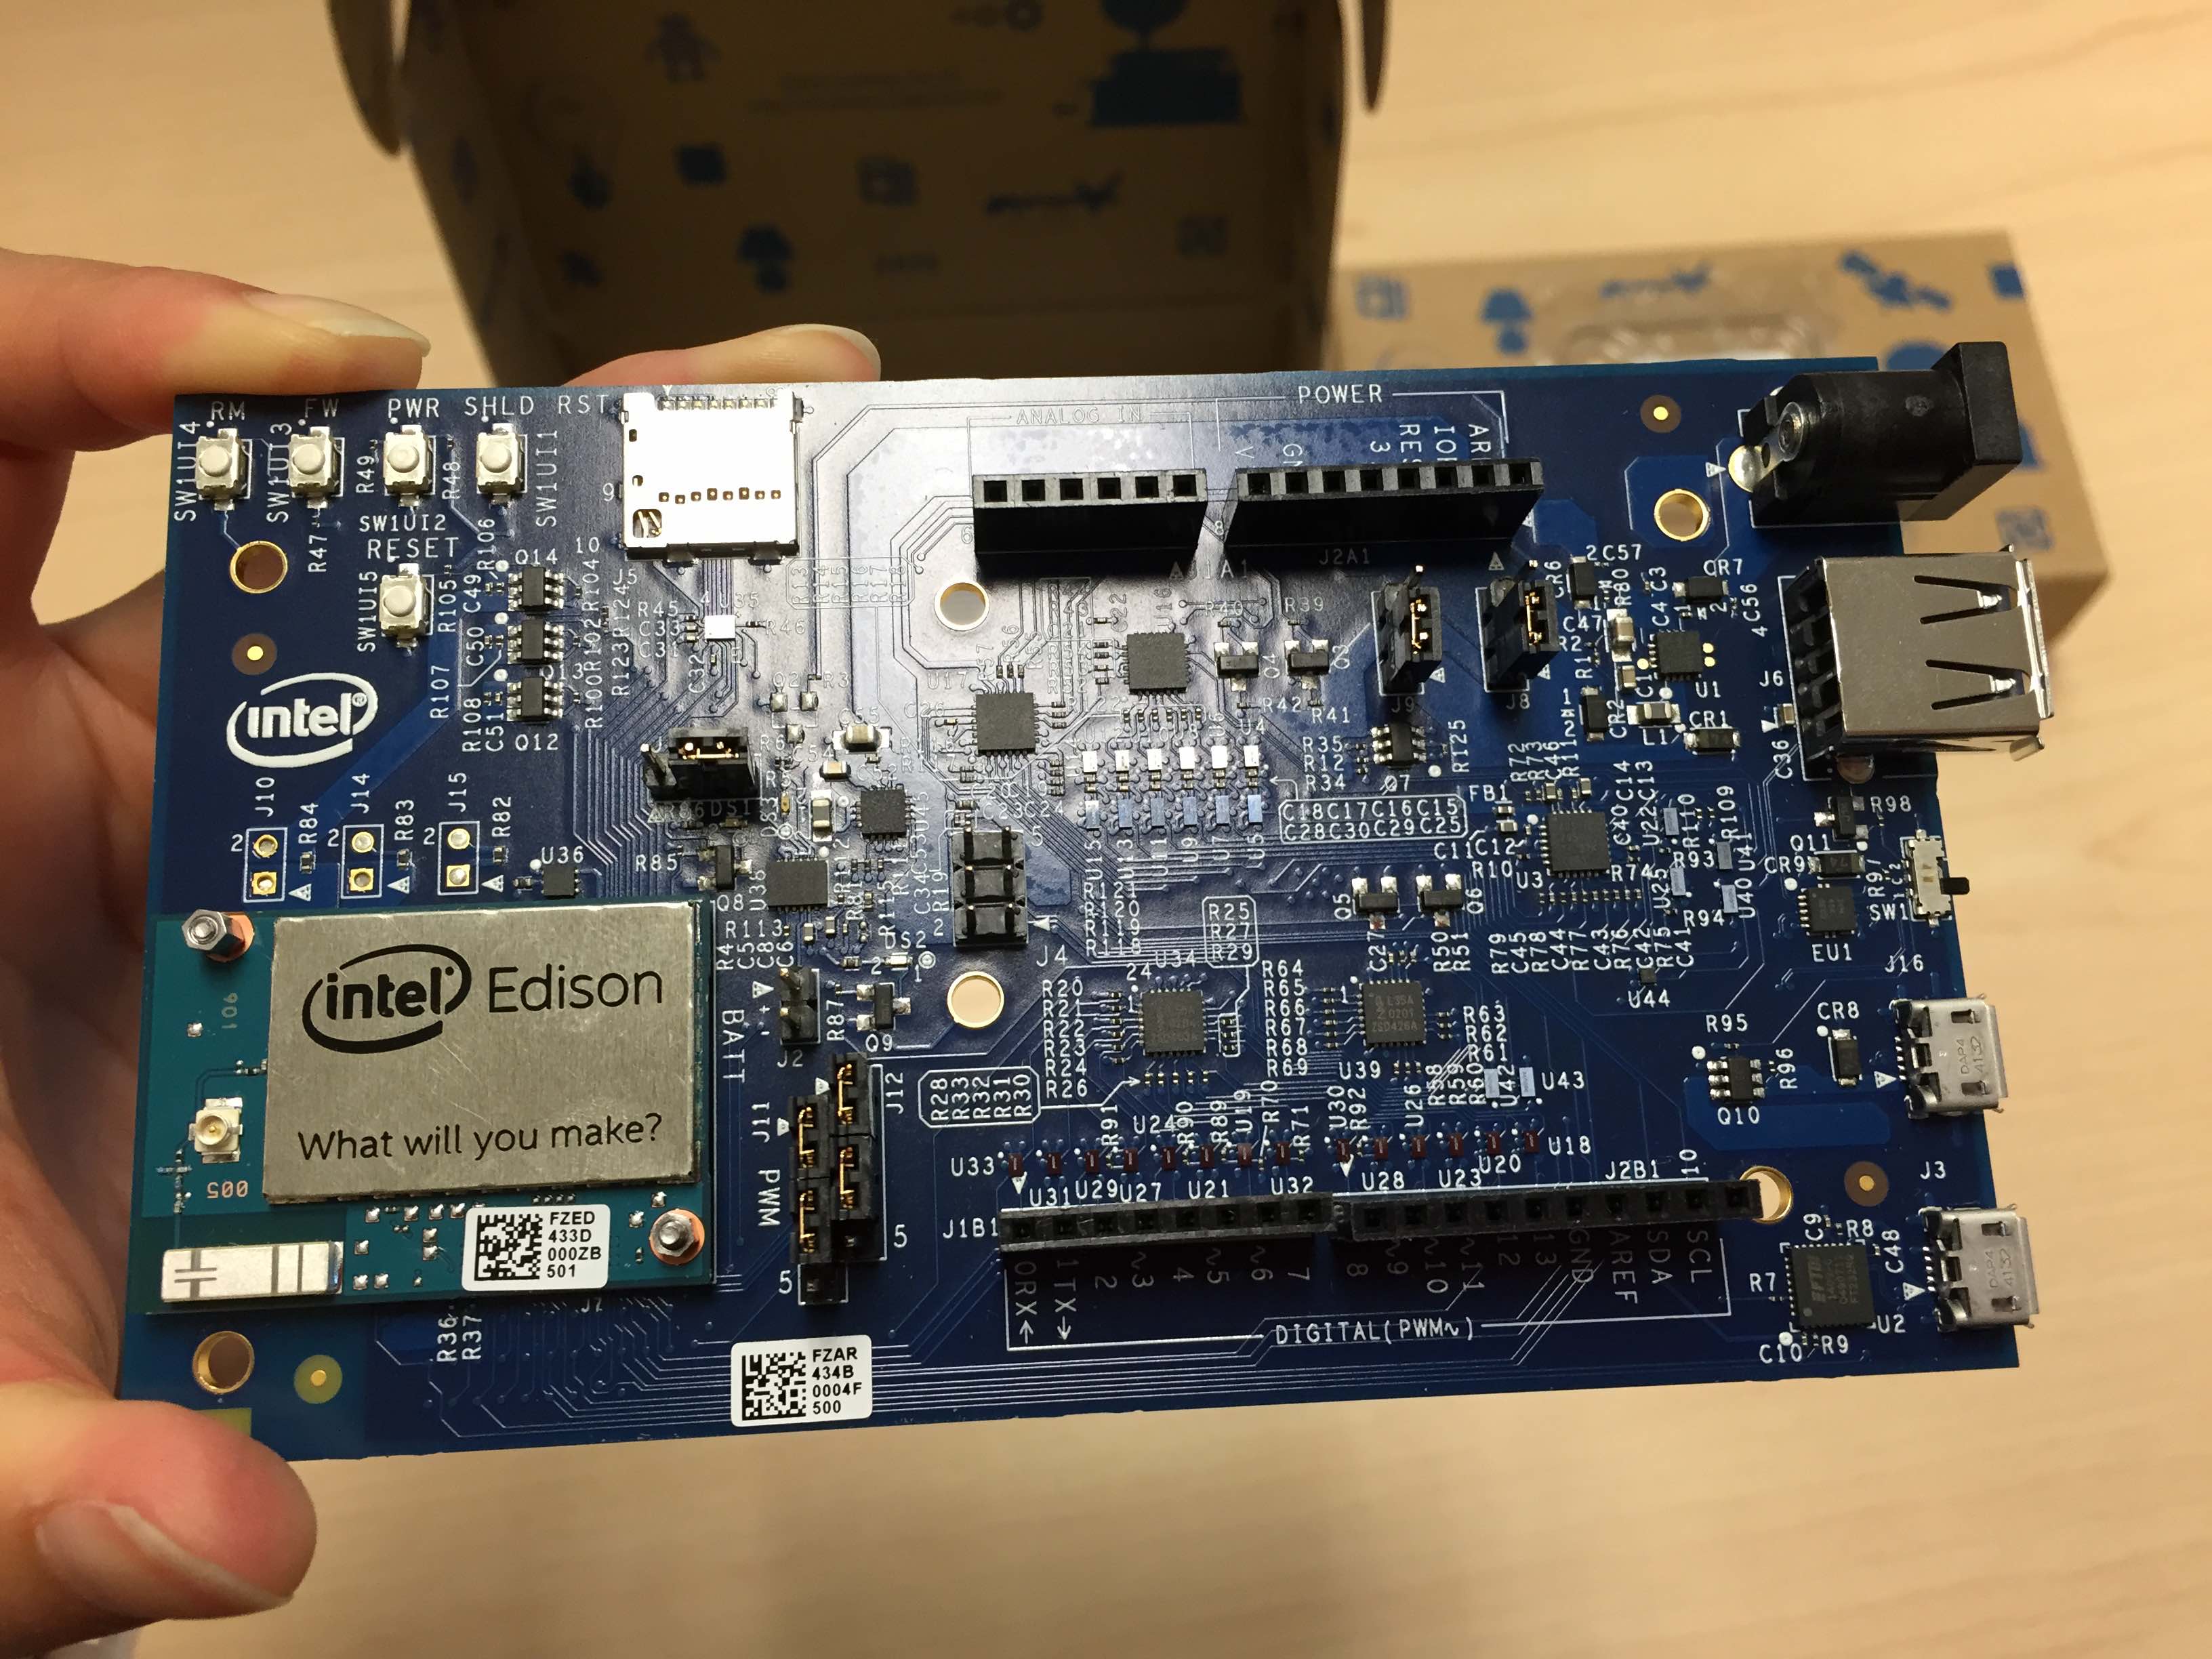
Here's what the assembled Mini breakout board with Edison should look like:
Setting up Edison with the Arduino breakout board
What's in the bigger box?
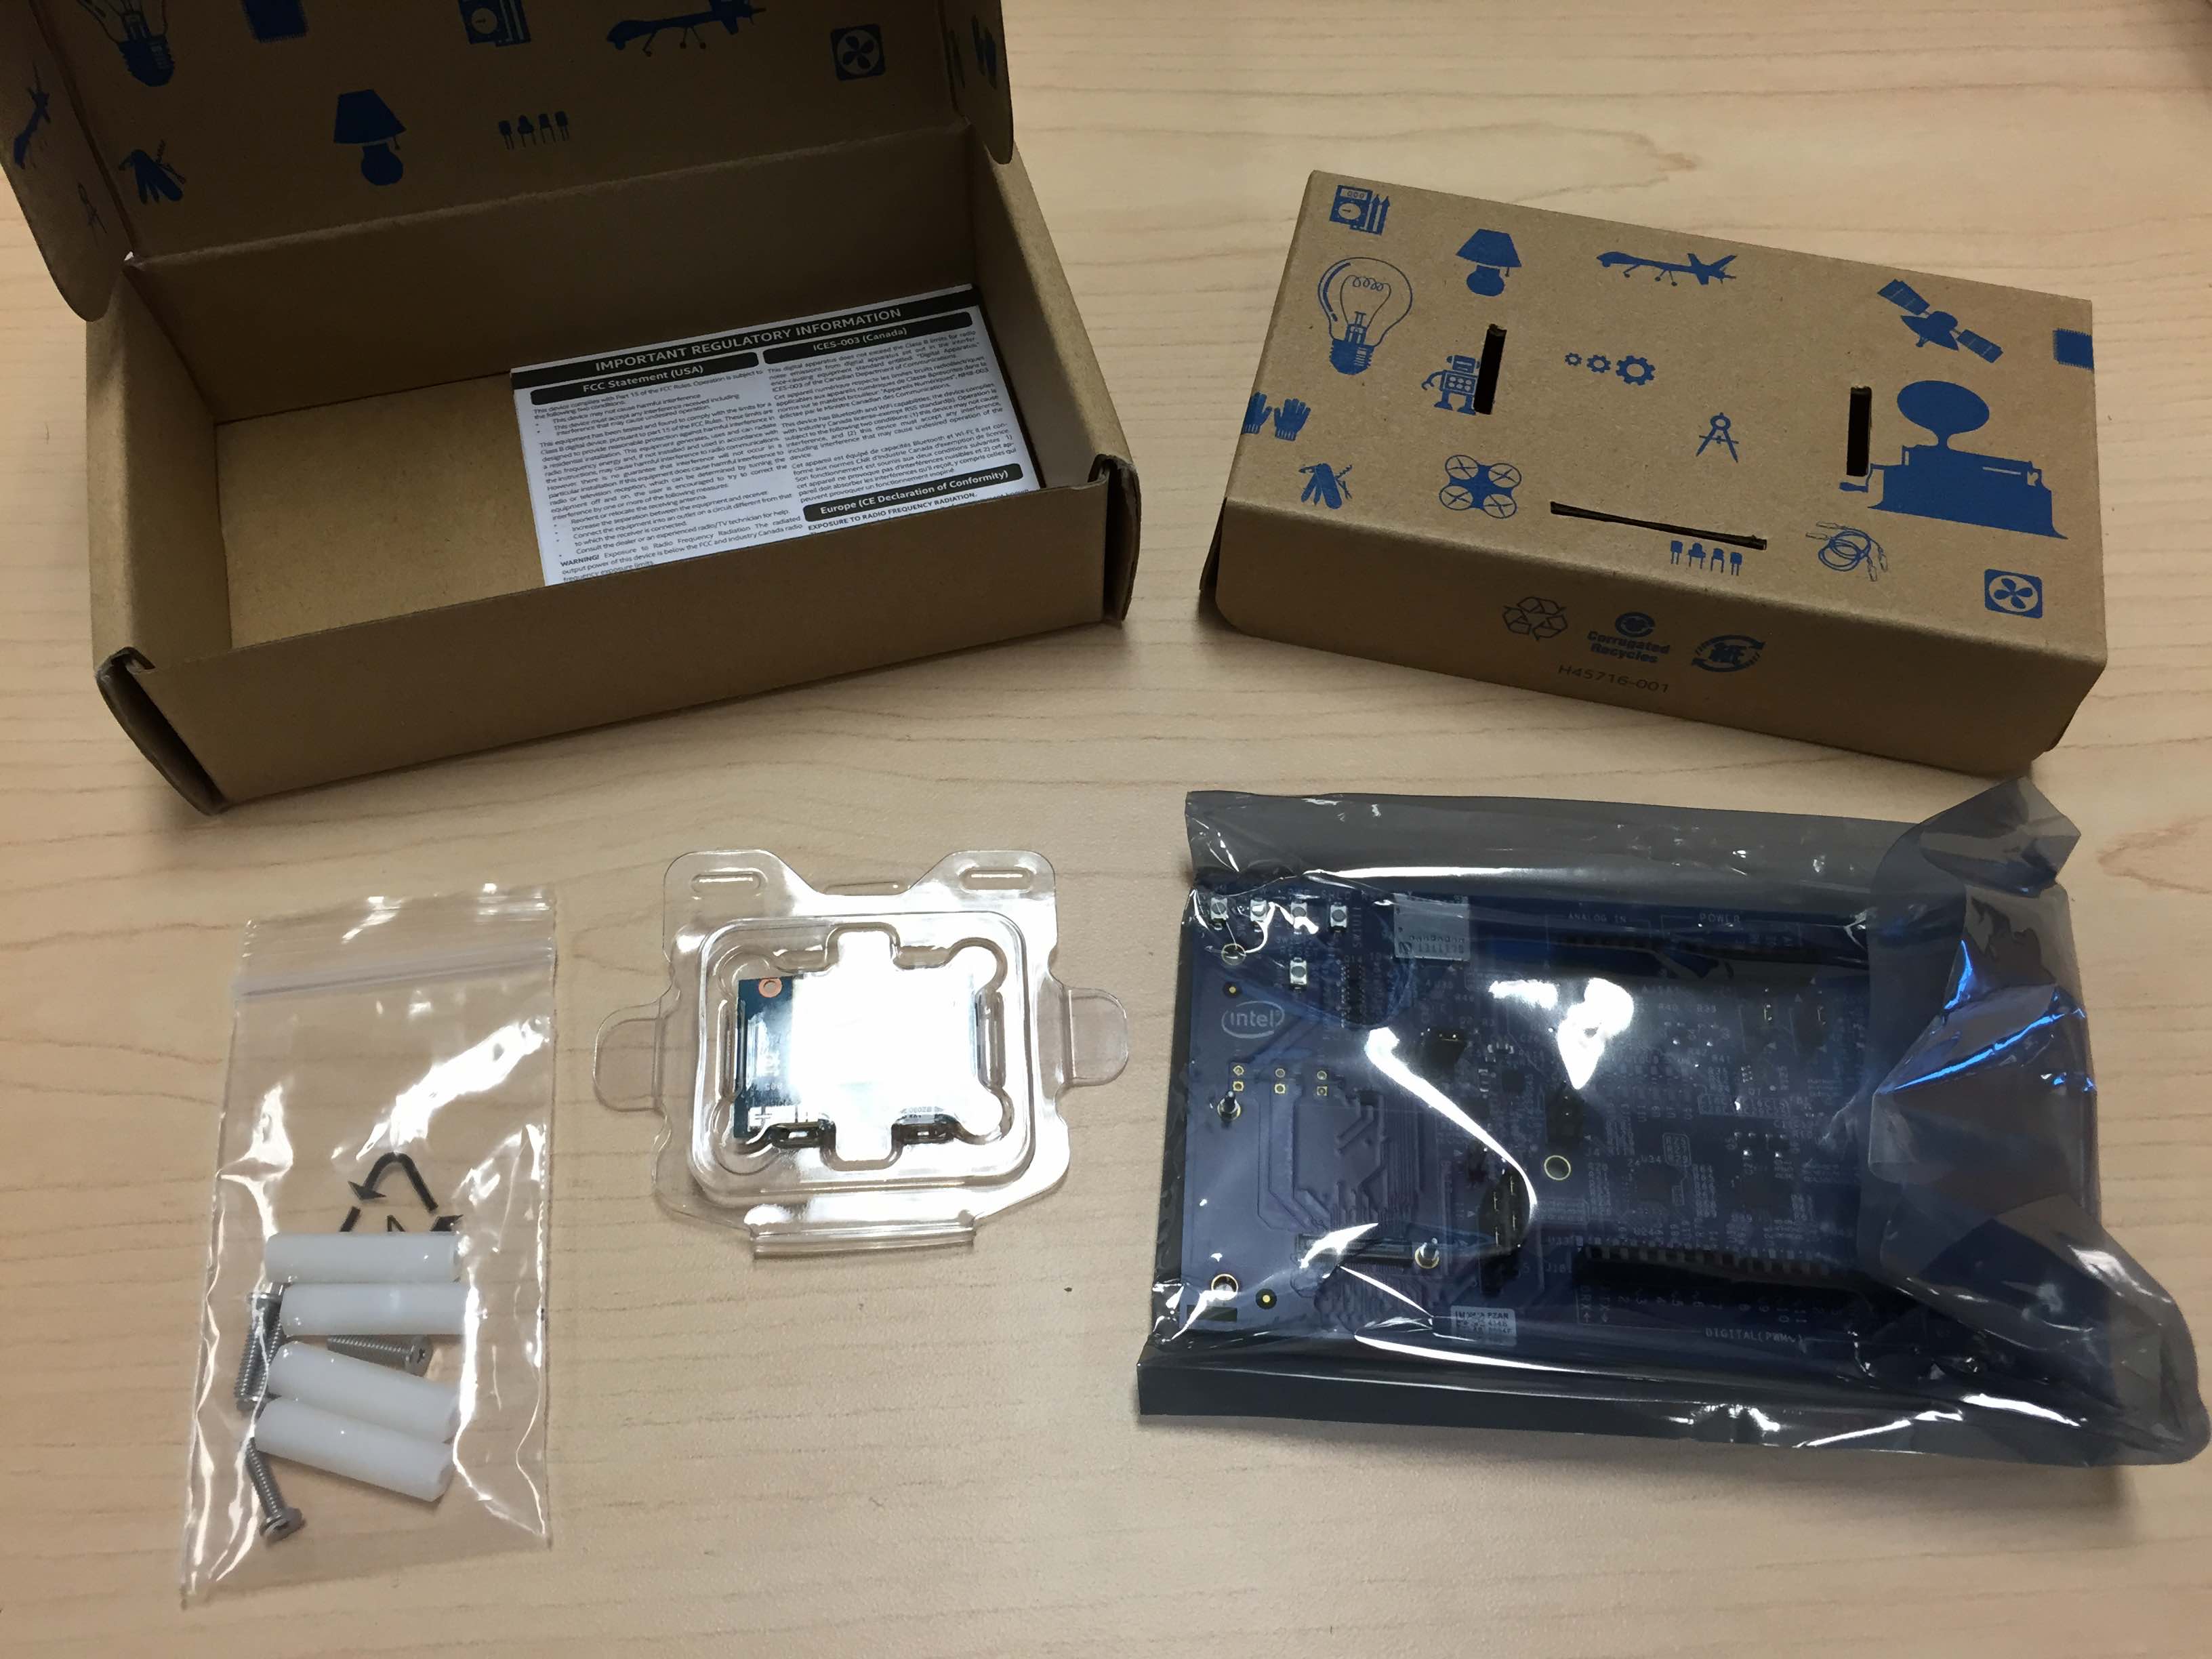
The Arduino breakout board kit comes with the following: the breakout board (bottom-right), Edison (bottom-center), and a ziplock bag with a variety of screws and such (bottom-left).
To get Edison onto the board, align the two holes on Edison over the two screws on the board. Push Edison into place until you hear a snap. Then take two hex nuts (in the ziplock bag) and hand-tighten them onto the screws; they don't have to be screwed on tight.
Note that there are additional screws and such in the ziplock bag, which are used to make a stand for the board. I didn't find this to be necessary, but feel free to assemble this part if you like.
Here's what the assembled Mini breakout board with Edison should look like:
Getting Edison up-to-date on Mac OS X
Now that we have assembled the hardware, connect two micro USB cables to the board and the other ends to the computer.
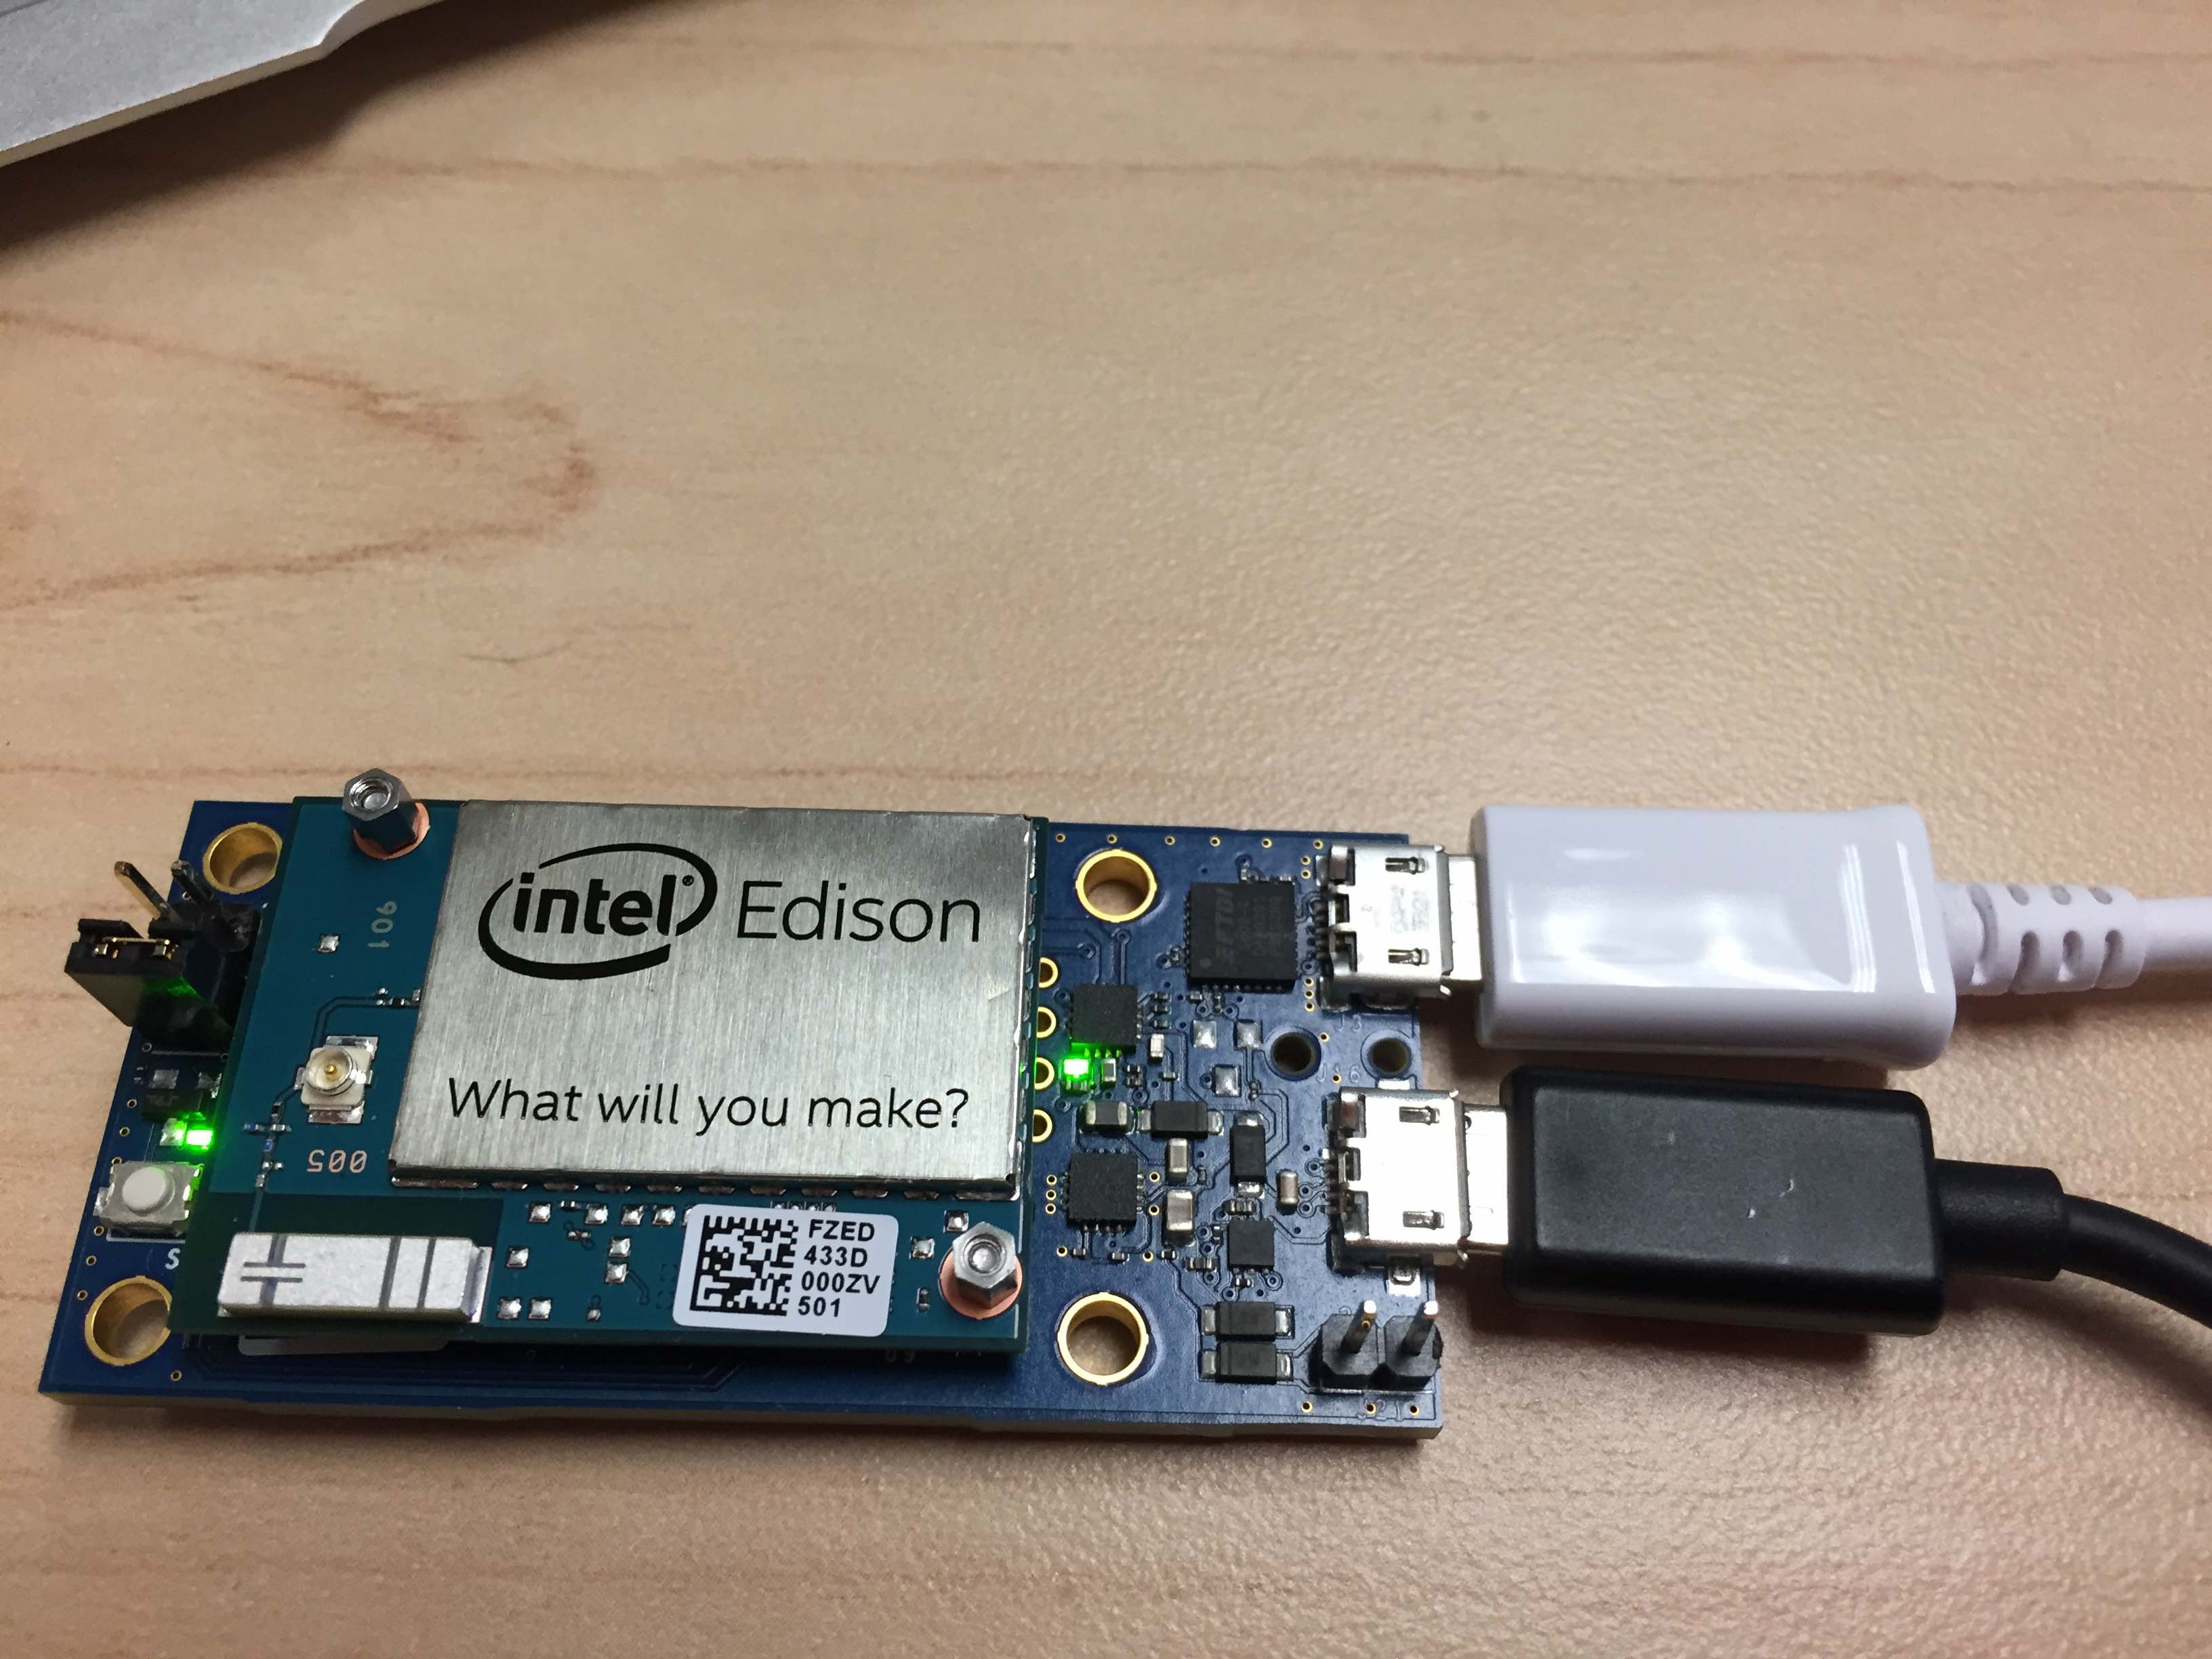
The black cable is used to power Edison. (The port is also USB On-The-Go, where it can act as host or a peripheral.) The white cable is used for serial communication with the computer. Later on, we'll set up Wi-Fi so that we can SSH into Edison over Wi-Fi, which eliminates the need for using the white cable. Note that the above picture shows the Mini breakout board, but setup is essentially the same on the Arduino breakout board.
To get Edison up-to-date, download the Edison Yocto complete image and follow these instructionsfor Mac.
Connecting to Edison from Mac OS X
To connect to Edison via USB, open a new Terminal window and type the following:
screen /dev/cu.usbserialPress Tab to auto-complete:
screen /dev/cu.usbserial-A402EXQLThen type 115200 -L. The final line should look similar to this:
screen /dev/cu.usbserial-A402EXQL 115200 -LNote that the characters after cu.usbserial- may be different for you.
Press Enter. A blank screen will appear. Press Enter a few more times until text appears on the screen. The Terminal window should contain text similar to this:
Poky (Yocto Project Reference Distro) 1.6 edison ttyMFD2

edison login:
At the login prompt, type root and press Enter. You may be prompted for a password, but if you've never set up Edison before, just hit Enter.
edison login: root
Password:
root@edison:~#
Congratulations, you are now connected to Edison from your Mac!
Configuring Edison and setting up Wi-Fi
Now that you're connected to Edison, let's configure it:
configure_edison --setupThis will walk you through the setup process. Use the --help flag to see other configuration options that are available.
After pressing Enter, you will be prompted to give Edison a unique name. For example purposes, let's give the name myedison, but feel free to choose your own name:
Configure Edison: Device Name

Give this Edison a unique name.
This will be used for the access point SSID and mDNS address.
Make it at least five characters long (leave empty to skip): myedison
Is myedison correct? [Y or N]: Y
You will then be prompted to enter a password:
Configure Edison: Device Password

Enter a new password (leave empty to abort)
This will be used to connect to the access point and login to the device.
Password:       ******
Please enter the password again:        ******
The device password has been changed.
You will then be asked to set up Wi-Fi:
Do you want to set up wifi? [Y or N]: YEdison will then scan for available networks. Enter the number for the network that you would like to connect to:
Configure Edison: WiFi Connection

Scanning: 1 seconds leftt

0 :     Rescan for networks
1 :     Manually input a hidden SSID
2 :     MyNetworkName
3 :     MyOtherNetworkName


Enter 0 to rescan for networks.
Enter 1 to input a hidden network SSID.
Enter a number between 2 to 3 to choose one of the listed network SSIDs: 2
Once successfully connected, you should see a message similar to this:
Done. Please connect your laptop or PC to the same network as this device and go to http://12.345.67.89 or http://myedison.local in your browser.Entering either URL in a browser window should give you a page that looks like this:
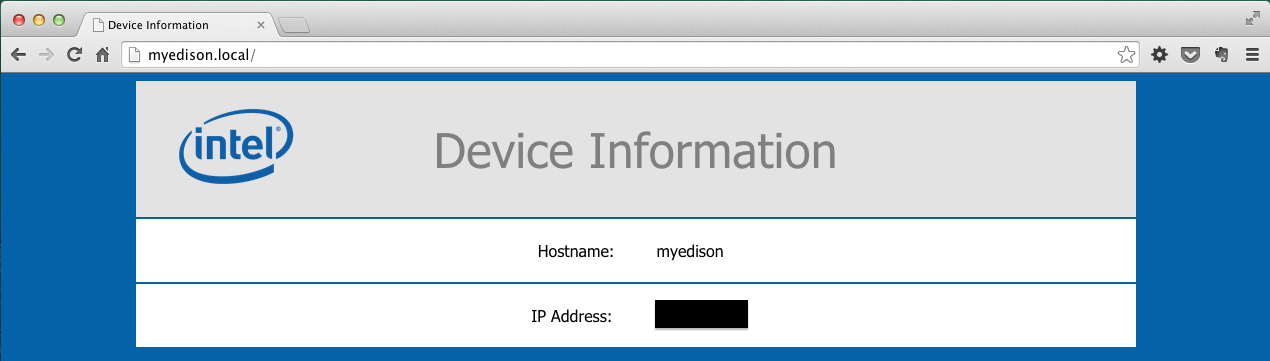
Congratulations, Edison is now connected to Wi-Fi!
SSH-ing into Edison over Wi-Fi
Now that Edison is connected to Wi-Fi, it's also possible to SSH over Wi-Fi, provided that the computer you want to log in from is on the same network. If so, open a new Terminal window and enter the following:
$ ssh root@myedison.local
root@myedison.local's password:
root@myedison:~#
When prompted for a password, use the password you created when configuring Edison.
Congratulations, you can now SSH into Edison over Wi-Fi!
Managing packages on Edison
Edison's operating system is based off Yocto Linux, and it uses opkg as its package manager. There are two very helpful repositories to fetch packages from, and I definitely recommend using them as you lay out the foundations of your project:
- Intel IoT dev kit libraries
- AlexT's unofficial repository—AlexT has done an awesome job of making popular packages available, such as git
Wrapping up
This is just the beginning. Now, the fun begins! Stay tuned, as I hope to write additional posts on my adventures with Edison.